Thank you again for this plugin. I pulled the trigger on the MRX 1140 yesterday and with this plug-in, I’m up and running with the new AVR in less than an hour.
Command question for you folks (I have also reached out to Anthem).
From what I can tell from the v5 command reference for the MRX-x40-AVM-70-90, it’s possible to get/set the name of a speaker profile (using SSPp0), and set the speaker profile for a given input (using ISiSPp). However, I can’t seem to find out how to change the speaker profile on the fly. Is this possible?
I know I could do probably do this through creating additional discrete inputs, each with the different profiles assigned, but programmatically, it would be easier to set the input and profiles independenty depending on the use case (e.g. listening positions).
In the end, I want to add icons that will allow the user to say if they are sitting in the front row, back row, or both, and show the status of the one that’s selected.
If you can telnet to the Anthem port, then you can try out various commands to see live what is possible. Get familiar with the interface first by issuing commands like “VOL+” to see how Anthem responds in the terminal session.
I’m very familiar with it, and I have the command reference. I just don’t see a command that can do what I noted above.
OK, then you’ll definitely need to speak to Anthem support.
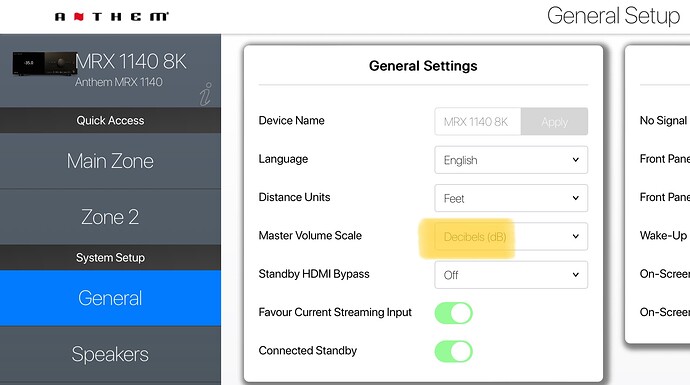
I just loaded this up. Thanks! I wanted to know my soundmode and volume in decibels.
Couple of things to note… Your volume attribute is “VolumeDecibel”. I changed it to “Volume” otherwise I would have to remap all my elements.
Because decibels is a different number range (-90db to whatever your “Maximum Volume” is on the Anthem), anyone changing to decibels with need to update the MIN/MAX property for their volume slider.
Decibels feedback still shows a “%”… no biggie… just limit the size of the label to cut off the %
Thanks again! Love the sound mode displayed:
Thats the problem… the command can only be sent for the input you want to configure. I doubt Anthem will comeback with a command to do what you want. I think what you’re doing is a good idea BTW, I take it your Speaker Profiles pin-point the location of the listener with different distance/level settings?
I think your either going to have to create duplicate inputs like you mention, or, you will need to fenagle THR buttons to send the proper ISiPSp command based off of .InputSource. There’s probably a couple different ways you could it.
Ye that’s what I intended; one setting for front row and one for both rows (or just rear).
For some reason I saw configuring the input with a different speaker profile to be undesirable. But in reality it’s not a big deal I suppose, and while I have already created the duplicate inputs and logic to implement, it should be easy to do through ISiPSp commands.
I’ll give it a whirl tomorrow, when I also plan to update the script to add nav support.
So…this was so much easier than I thought 
In the older x20 series, you could set the profile to the active input. This isn’t available in the x40 for some reason. Also, there is a documentation bug, where the profiles actually start at ‘0’ for the first profile (not ‘1’) as documented, etc…
In my case, the only inputs that need to have different seating positions are the Apple TV (i=7) and Blu-Ray (i=6). My Front Row profile is in the first slot (p=0) and the Back Row profile is in the second slot (p=1).
Changes to the script:
added this block above case “MediaCommand”:
    case "SeatingPosition":
        if (value == "Front") { //format ISiSPp ... change i and p as needed
            cmd = "IS6SP0;IS7SP0"; //yes, you can string commands together!
            break;
        }
        else if (value == "Back") {
            cmd = "IS6SP1;IS7SP1";
            break;
        }
also added this in OnSynchronizeDevices after the device.Capabilities line
device.Attributes = ["SeatingPosition"];
with these, I can now assign the action and trigger the change with a single click.
I also added some basic navigation commands to the MediaCommand case statement (would have been more efficient to use a nested select statement, but I was lazy 
        else if (value == "Setup") {
            cmd = "Z" + device.Id + "SIM0012"
        }
        else if (value == "Info") {
            cmd = "Z" + device.Id + "SIM0017"
        }
        else if (value == "DirectionUp") {
            cmd = "Z" + device.Id + "SIM0018"
        }
        else if (value == "DirectionDown") {
            cmd = "Z" + device.Id + "SIM0019"
        }
        else if (value == "DirectionLeft") {
            cmd = "Z" + device.Id + "SIM0020"
        }
        else if (value == "DirectionRight") {
            cmd = "Z" + device.Id + "SIM0021"
        }
        else if (value == "Select") {
            cmd = "Z" + device.Id + "SIM0022"
        }
Some more tweaks for the seating position.
Added the following to the onPoll function to read status:
if (message.substring(3,6) == 'SP0' ) {
    var deviceId = 1; //1 or 2 ... doesn't matter really since speaker profiles are global
    var device = plugin.Devices[deviceId]; //yes, I could simplify :)
    console.log ("Front");
    device.SeatingPosition = "Front";
}
if (message.substring(3,6) == 'SP1' ) {
    var deviceId = 1;
    var device = plugin.Devices[deviceId];
    console.log ("Back");
    device.SeatingPosition = "Back";
}
With this, I now have a way to toggle between the two and set visual status accordingly:
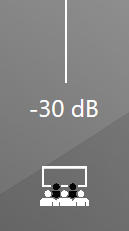

(thanks, @Jdamore, for the inspiration to get this implemented…I would have taken a longer, more convoluted route to get this done without your comment!)
I’m attaching my customized version of the script if anyone wants to follow along.
anthem_plugin_script (LJR mods).txt (9.4 KB)
Nice work @LJR
Question… How did you get the “dB” after the value? is that just another label?
I used your plugin script and tossed together a quick example. I put in as many commands as I can think of except for your speaker profile stuff. I’m not sure how to handle that yet…
See Attached Example:
Anthem_Example_2022_12_23.hrp (1.2 MB)
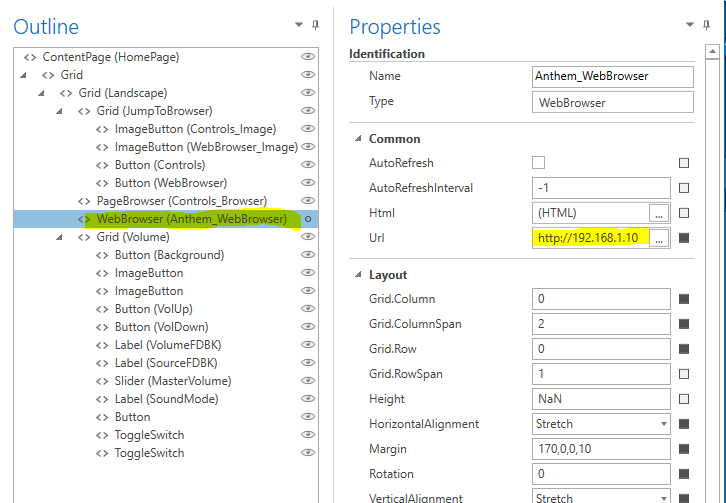
Once you open the example, remember to change the IP (and port if different) of “Anthem_MRX_AVM” (right click > open). Also change the IP in the properties of the WebBrowser.
Sorry @Kryten67 'your original volume attribute has changed from " Volume" to VolumeDecibel". Is it possible to do both in the script? I’m not smart enough for that stuff ha!
Hey @Jdamore … I loaded it up - had to make some small changes to the plugin naming to get it to work.
What I recommend you do is copy the plugin text, delete both the device and plugin script, then then add the plugin via “Import from Code”. That will recreate the device and script, allow you to configure the IP, and it should work immediately without any further changes (I’ve tested this procedure and it works for me)…
Also, be sure to have decible set on the AVR. Otherwise, the integer reported will be incorrect.
Anthem_Example_for jdamore.hrp (1.1 MB)
Now its showing “dB” as it should. Yeah… it was set to % on the MRX (I must have switched it at some point in my tinkering  )
)
I updated my example project in my last post.
No need to delete anything. You just need to update your IP address…
Just right-click on the device and open:
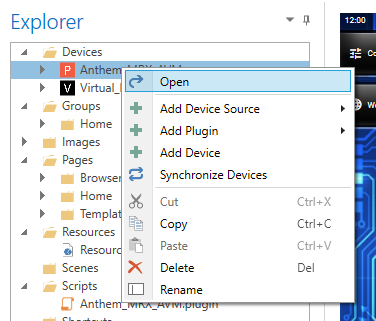
Change the IP:
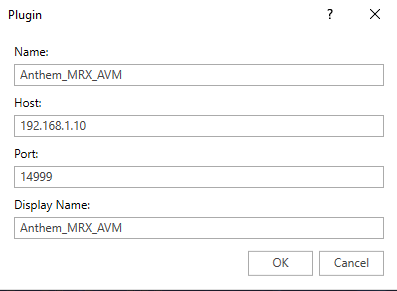
Also change the IP of the WebBrowser to point it at your Anthem:
LJR,
Hey I have been trying to get this plugin working for my MRX 1120 but I keep getting a message that the connection wont work as the device is actively not accepting it. Any suggestions? I have made sure the IP and ports are right.
Cheers
Make sure you can connect to the device manually first. Use a telnet-like package like PuTTY and make a connection to IP address, port 14999 (assuming this hasn’t been modified from original). Make sure that these are the values that are in the .plugin file, for example (line 9 in my file):
plugin.DefaultSettings = { “Host”: “192.168.100.91”, “Port”: “14999” };
If you open a session (note: do not use ‘enter’), you should be able to type in: IDM?;
And the device should respond with it’s model#, in my case: IDMAVM 60;
Still getting network error: connection refused.
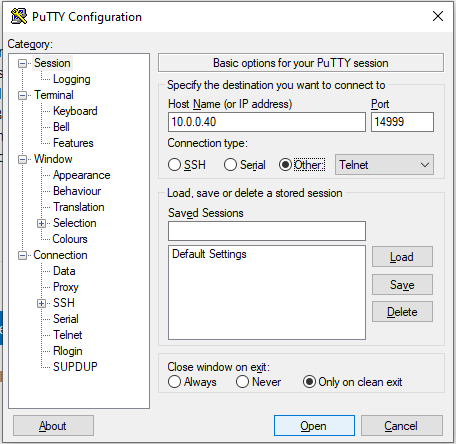
I’ve tried it with and without port forwarding in the router but still not connecting. I have a hardwired connection to the receiver as well as wifi and tried both in isolation. Any other thoughts?
Thanks!
So an update - by changing the MRX1120 IP to auto then back to manual (and changing the IP back) I can connect telnet and use the commands with the right stuff returning. When I use the example hrp file and start - it comes up with the right status (i.e. input number illuminated and volume level). But as soon as I click on mute or volume down - the connection seems to freeze and the only way to get a connection again is to reset the IP to auto then manual again (or turn the AVR off then back on) Any thoughts?
Thanks!
10.0.0.x is an invalid subnet. Reconfigure your network equipment to use/issue 10.0.1.x subnet. That should resolve it.
Hmmm. My entire network runs on 10.0.0.x as it’s set by the router. Also there is no issue with using Telnet it appears. The subnet that is used for the network is 255.255.255.0.
Thanks for the help - its greatly appreciated. I’ll play around a bit more and let you know how I get on.
Thanks.
Yup, I think there’s nothing wrong with 10.0.0.x as long as you’re not trying to use 10.0.0.0 anywhere.
I assume that:
- You’ve not modified the plugin code in ANY way, other than the IP address/port in the file.
If telnet is working reliably, then there’s probably nothing wrong with your network. Run the .hrp with “Start” on your PC (in The Home Remote Designer) and see if any useful info is recorded to log. You can add logging commands to the plugin itself to aid in debugging.


