
Hello all
I was inspired yesterday, and decided to give my THR HT remote a UX overhaul. I am sharing not only to get some constructive criticism, but also upsell to newcomers a more simple layout than we’ve seen with some of the other amazing projects on here, and also how I’ve worked around some limitations of the current solution.
I’m just a customer, and still think there is so much potential for THR that I encourage everyone I speak to with similar needs to give it a try (this is why I’ve put almost as much effort into this post as the overhaul itself). Once you get over the hump, it’s a very powerful framework to develop almost anything you might need w.r.t. home automation.
A bit about my system: I’m mostly interfacing with my equipment with a combination of Global Cache devices (legacy TCP client), direct device and Node Red connections via IP (custom plugins) and Home Assistant (built-in plugin). The global cache is used for the projector. Main reason…the projector only supports a single TCP connection, and I want to ensure from other places in the house that it’s off when not being viewed. Global Cache IP2SL serial devices allow simultaneous connections, so I’ll never be “locked out.” Pro Tip: For those who don’t want a GC, you can do the same with Node Red acting as a go-between!
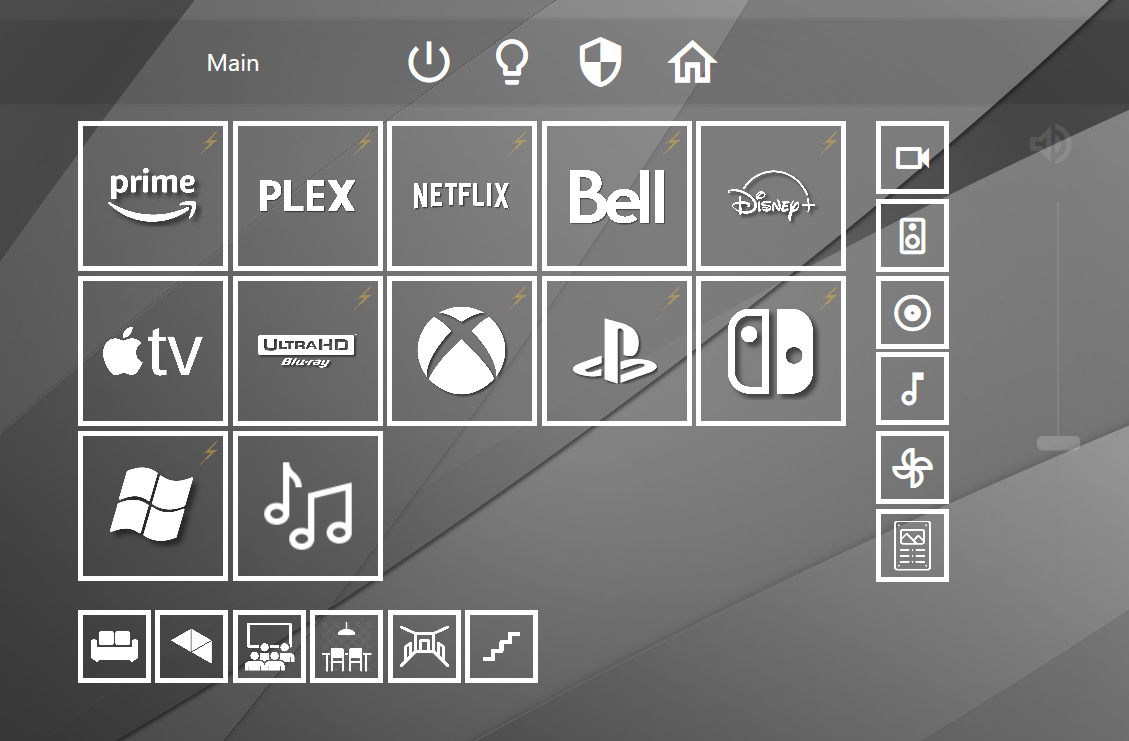
THR is running on a dedicated iPad mini (designer is running in Windows emulation to get around the lack of a iPad Mini config, which I’ve found is forced with Apple devices). The main page uses big icons for the primary actions and smaller icons for device interaction. I’ve used icons that are intuitive for our environment - triangles, for example, are the Nanoleaf panels we have on our back wall.
The top panel is a page browser that links to a page dedicated to controls that are to display on every page (each page has the same page browser embedded). The volume controls on the right, which are currently dimmed because the AVR is off, are also in a pagebrowser-linked page.
The title of the page is captured in a virtual device variable, and is set using the pages “loaded” event.
In the top-right corner of many of the large icons, you’ll notice a thunderbolt. This is how I overcame the distiction of not having different tactile actions (i.e. long-press, double-tap). So in this case, pressing the tile will just switch to the source, whereas the lightning bolt will switch and trigger the scene actions to turn off the lights, turn on all the required devices, etc. Other colours are used to show when the state is different (e.g. red signifies action probably should be taken, and the projector icon will show when it’s warming up, cooling down, or has an error.
Clicking on the home button in the top panel will take you back to the home page.
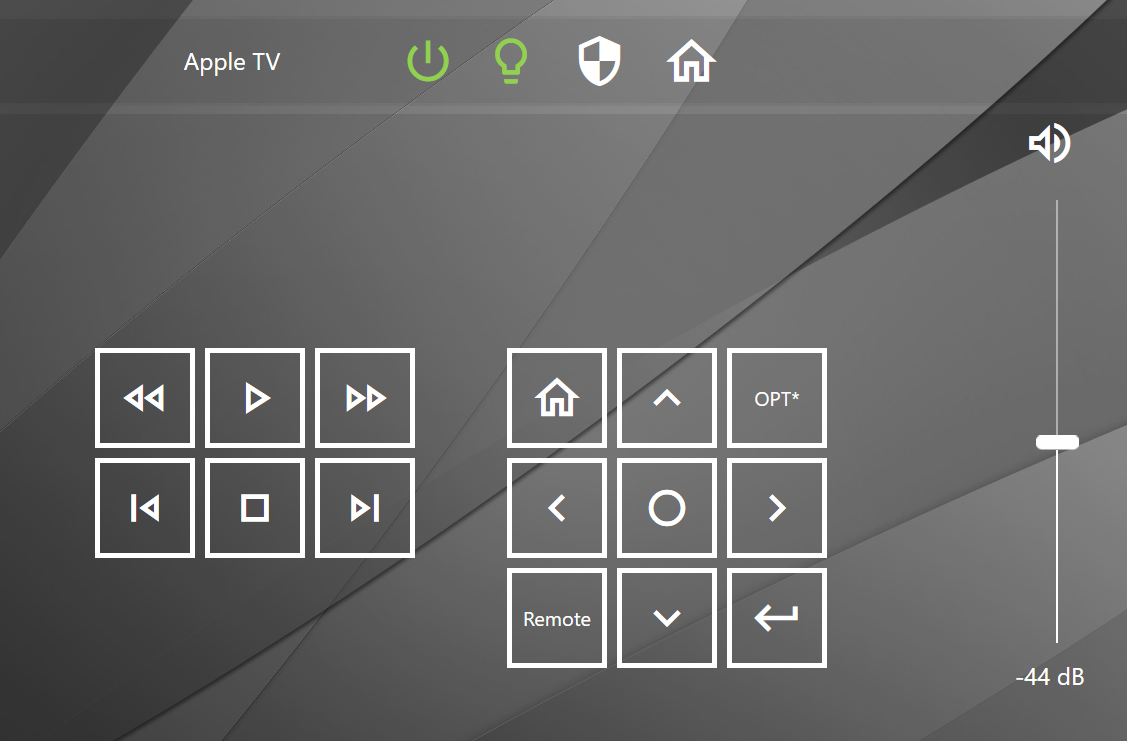
Above is an example after launching one of the streaming services via the lightning bolt. It takes you to the Apple TV control page, sets the title.
The remote button links to a iOS shortcut to pull up the built-in AppleTV remote (in case I need to swipe). That being said, I still use the physical ATV remote for the siri integration (so much easier to speak the name of a movie vs navigate to it  .
.
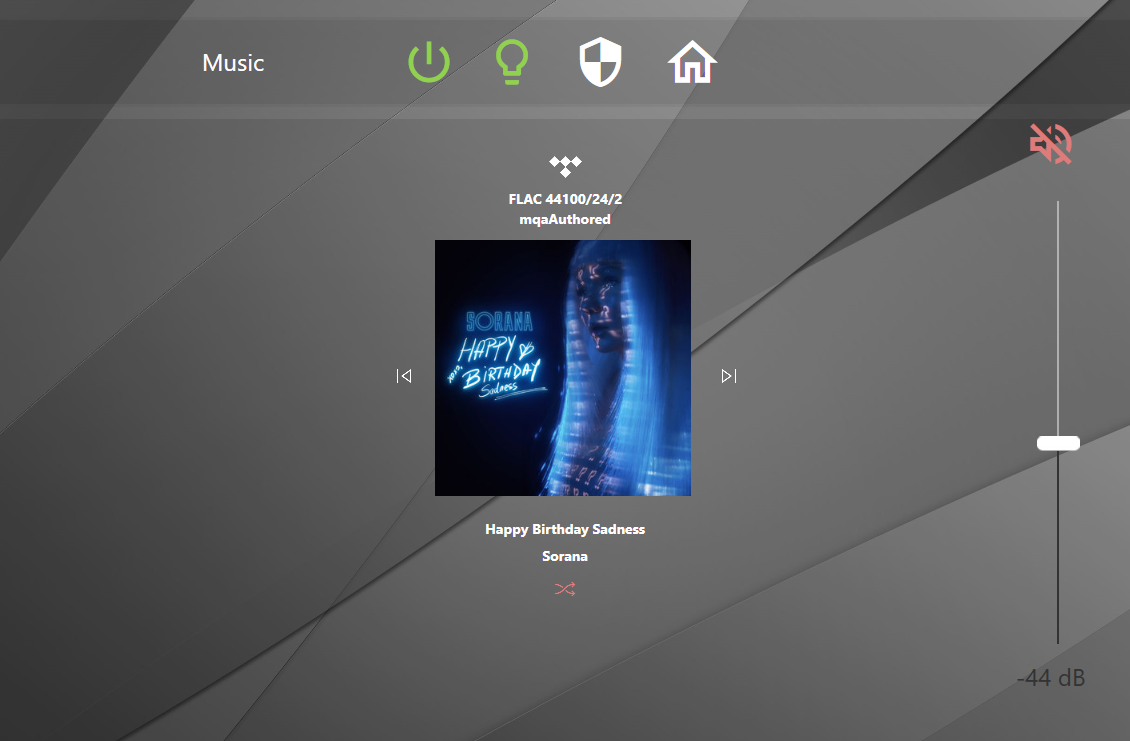
Above is a view of the music page with the volume muted. This interfaces directly with Node Red which keeps track of the Bluesound Node status, pulling metadata and artwork.

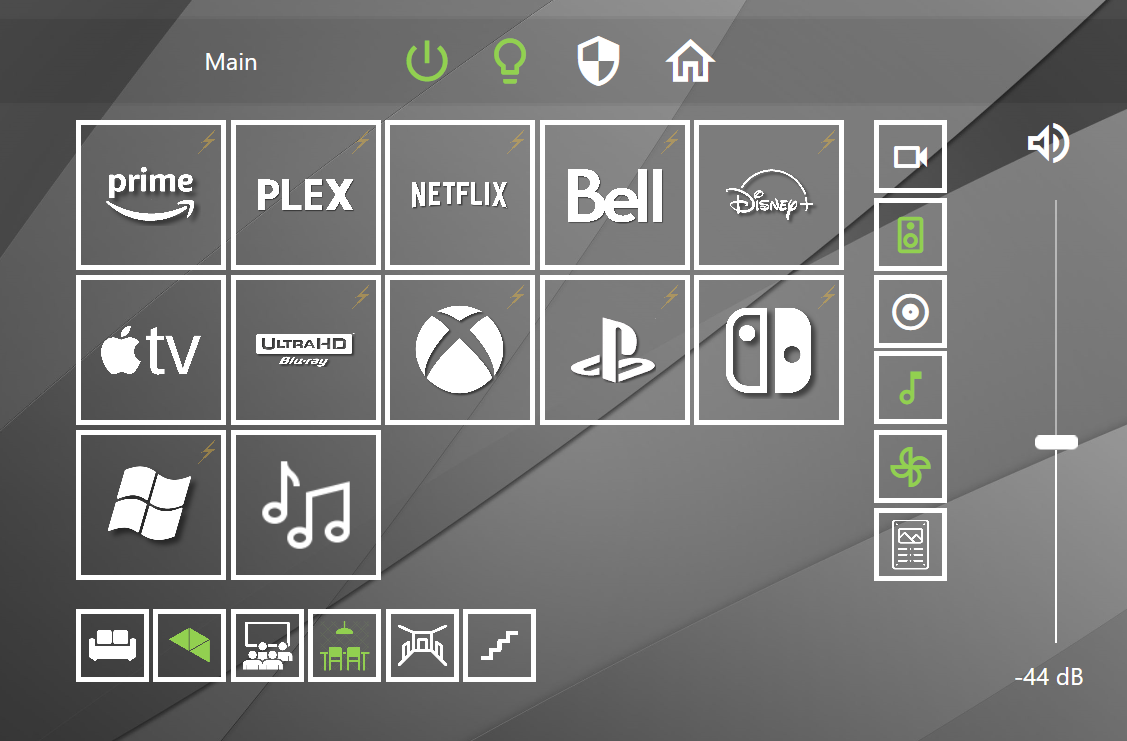
Above is a page with live streams and dynamic icons to show the state of the home. Icon images will change when the state changes:

That’s basically it. I still have a little work with formatting (mostly fiddling around with grids so that placement works regardless of the connecting device resolution), but I’m happy with the results. Please let me know what you think below, and if you have any questions on how I did anything, please let me know.
 but this is really good! If I were to change anything I would enlarge the cover-art of your music page.and put it side by side with the song info.

