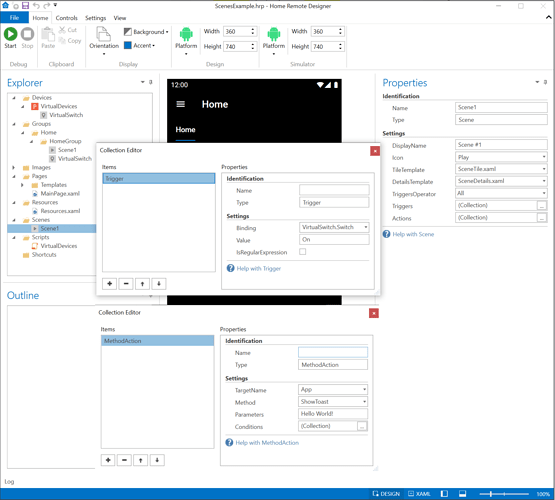
There’s a new Scenes feature in the 3.10.0 release.
The same sets of “Actions” that were previously only available to XAML pages can now be created outside of that context in a convenient folder.
These scenes can be triggered to run either manually or automatically.
1. Manual
You can create buttons or device tiles that execute scenes. Scenes are much like device objects, they can be assigned both a TileTemplate & a DetailsTemplate. In terms of control, they are all automatically given the Scene capability. Writing to the Scene attribute will execute the scene. In ScenesExample.hrp, this is demonstrated by clicking the “Scene #1” tile.
2. Automatic
Perhaps the biggest complaint received from the version 3 transition to device objects from variables was the lack of ability to run custom actions on device changes. Well that’s no longer the case. Devices can trigger these scenes too to run automatically.
Each Scene has a Triggers property. Each Trigger within that collection is a Binding to either a device or system attribute. These will be configured very similar to the way a MultiDataTrigger is configured on a XAML page. The only difference is that scenes include an additional option those don’t have: TriggersOperator.
TriggersOperator.All
This means all conditions must be satisfied to trigger the scene. In other words, a logical AND.
TriggersOperator.Any
This means any condition can trigger the scene. In other words, a logical OR.
In ScenesExample.hrp, this is demonstrated by turning on the “VirtualSwitch” device tile. The Scene in that project has a Trigger that will execute the scene when VirtualSwitch.Switch equals On.
ScenesExample.hrp (96.7 KB)


 With that functionality and the use of virtual devices I would be able to track the status of a scene. I could send you a project with that functionality implemented and you could review if a status property for a scene would be a better idea.